

Welcome to part three of our Building with React & Flux series. Check out the Getting Started and Hello React Banners posts to get up to speed on React and Flux if you are new to it.
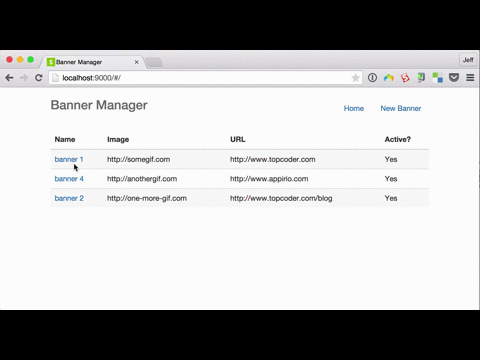
To recap, we are going to build a simple app to manage banner ads using React and RefluxJS, one of the many implementations of Flux. My goal is to make this application as simple as possible while demonstrating the basics of React and Reflux. Last week we built a simple app that looks like the following:
- The 'home page which displays a table of all banners
- A form to add a new banner
- A view that displays a banner and provides the functionality to toggle the display status of the banner
Today we're going to build a super-simple API and then tie everthing together next week with a nice look UI.
Our API is going to be using Express and MongoDB for persistence. It's a basic Express app that I created using the command line app generator. I just added in MongoDB and the basic CRUD functionality to the routes. Security for the API is beyond the scope of this post. You can find all of the code for the API on this github repo.
Getting Started
To run the application locally, simply clone this repo
git@github.com:jeffdonthemic/hello-react-banners-api.gitThen install all of the dependencies for the project defined in package.json:
npm installStart Mongo locally (assuming it running on the default port of 27017) and then:
npm startYou should now be able to open up http://localhost:3000 and see an empty array returned. You can use the POST route to add some data based upon the model below.
Model
Our model is pretty simple as we only have 4 properties for our banner object:
var mongoose = require('mongoose');
var Schema = mongoose.Schema;

var Banner = new Schema({
 name: {
  type: String,
  required: true
 },
 imageUrl: {
  type: String,
  required: true
 },
 targetUrl: {
  type: String,
  required: true
 },
 active: {
  type: String,
  required: true,
  default: 'Yes'
 }
});

module.exports = mongoose.model('Banner', Banner);
Route
The bulk of the application is in the routes/index.js file. This is where we add all of the functionality to return all banner records, return a banner by its ID, create a new banner and of course update an existing banner. It's pretty much standard boilerplate CRUD functionality for MongoDB so it should be pretty straightforward looking at the code below.
var express = require('express');
var router = express.Router();
var _ = require('lodash');
var Banner = require('../models/banner');

/* GET all banners */
router.get('/', function(req, res) {
 Banner.find({}, function(err, banners) {
  if (err)
 res.status(500).json(err);
  res.json(banners);
 })
});

/* POST create banner */
router.post('/', function(req, res) {
 var banner = new Banner(req.body);
 banner.save(function(err, banner) {
  if (err)
 res.send(err);
  res.json(banner);
 });
});

/* PUT update a banner by id */
router.put('/:id', function(req, res) {
 Banner.findById(req.params.id, function (err, banner) {
  if (err) {
 res.send(err);
  } else {
 // assign submitted properties to object for updates
 _.extend(banner, req.body);
 banner.save(function(err, banner) {
  if (err)
   res.send(err);
  res.json(banner);
 });
  }
 });
});

/* GET banner by id */
router.get('/:id', function(req, res) {
 Banner.findById(req.params.id, function (err, banner) {
  if (err)
 res.send(err);
  res.json(banner);
 });
});

module.exports = router;
Conclusion
Now that we have our API done, we are ready to implement our React components with a nice looking layout and wire them up the to API. We'll take a crack at this in next week's final post in this series.


